Plantain Balm – A Super Simple Recipe
When anyone comes on a walking tour with me, one of the first plants I direct them to is the little cluster of plantain growing along the paths of Courtown Woods.
Called Slánlus in Irish it roughly translates as goodbye pain or goodbye troubles. If you haven’t read the blog on this amazing little healing plant do so first before you try the recipe. But it truly is a powerful little plant and this balm can be used again and again for so many things! check out the list below!
- Sunburn
- Stings & Bites
- Dry Skin
- Infected hangnails
- Chapped lips
- Burns
- Nettle stings
- Flea bites
- Embedded Thorns or Splinters
- Blisters
- Spots and hives
- Dry heels and elbows
- Grazes, scratches and small cuts
- Rough or cracked skin
- Rashes and inflamed skin
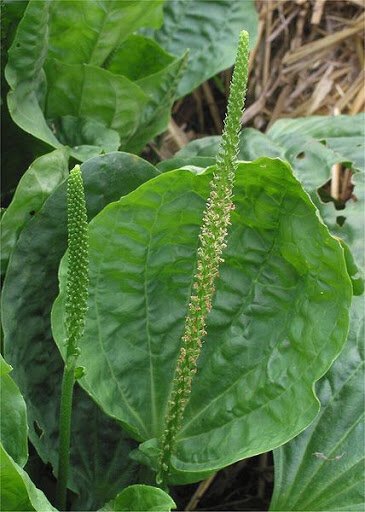
There are two types of Plantain available freely in Ireland, the broadleaf as seen above or the narrow leaf pictured below. Both work just as well and you can even mix the two in this recipe. Both types have the same healing properties.

- Antibacterial: it inhibits the growth of bacteria
- Astringent: it reduces secretions and discharges
- Antiseptic: it inhibits infections
- Demulcent: it soothes by forming a film over mucus membranes and draws out toxins
- Hemostatic: it stops bleeding
- Vulnerary: it heals wounds
So to make this balm you will need:
- A slow cooker or double boiler*
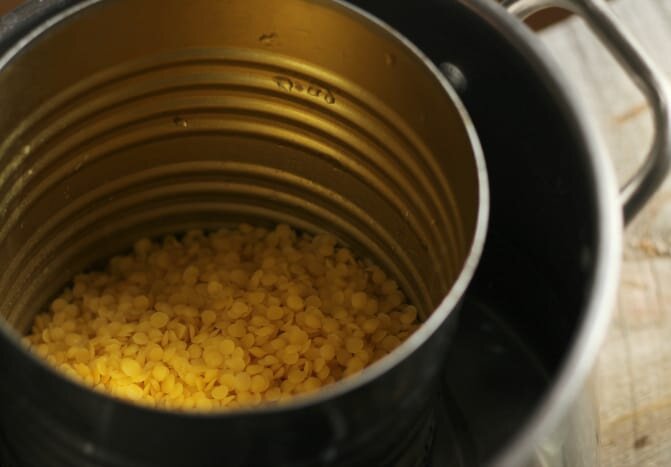
- 250mls Beeswax pellets – found in art supply shops or buy online example bomar.ie based in Wicklow
- 1 Litre of Carrier Oil, Rapeseed, Almond, Olive or even sunflower all make good carrier oils
- Small containers to store your balm. This is a chance to use up all those pretty little mini jam jars or yogurt pots gathering dust in the back of the press!
- A small bowl or measuring jug that you don’t mind never using again!
Method:
Gather a large fruitbowl sized container of plantain leaves, look out for fresher, younger leaves, but remember the rule, never take more than a third from one plant.
Give the leaves a good wash to remove any dirt or insects and let them dry thoroughly.
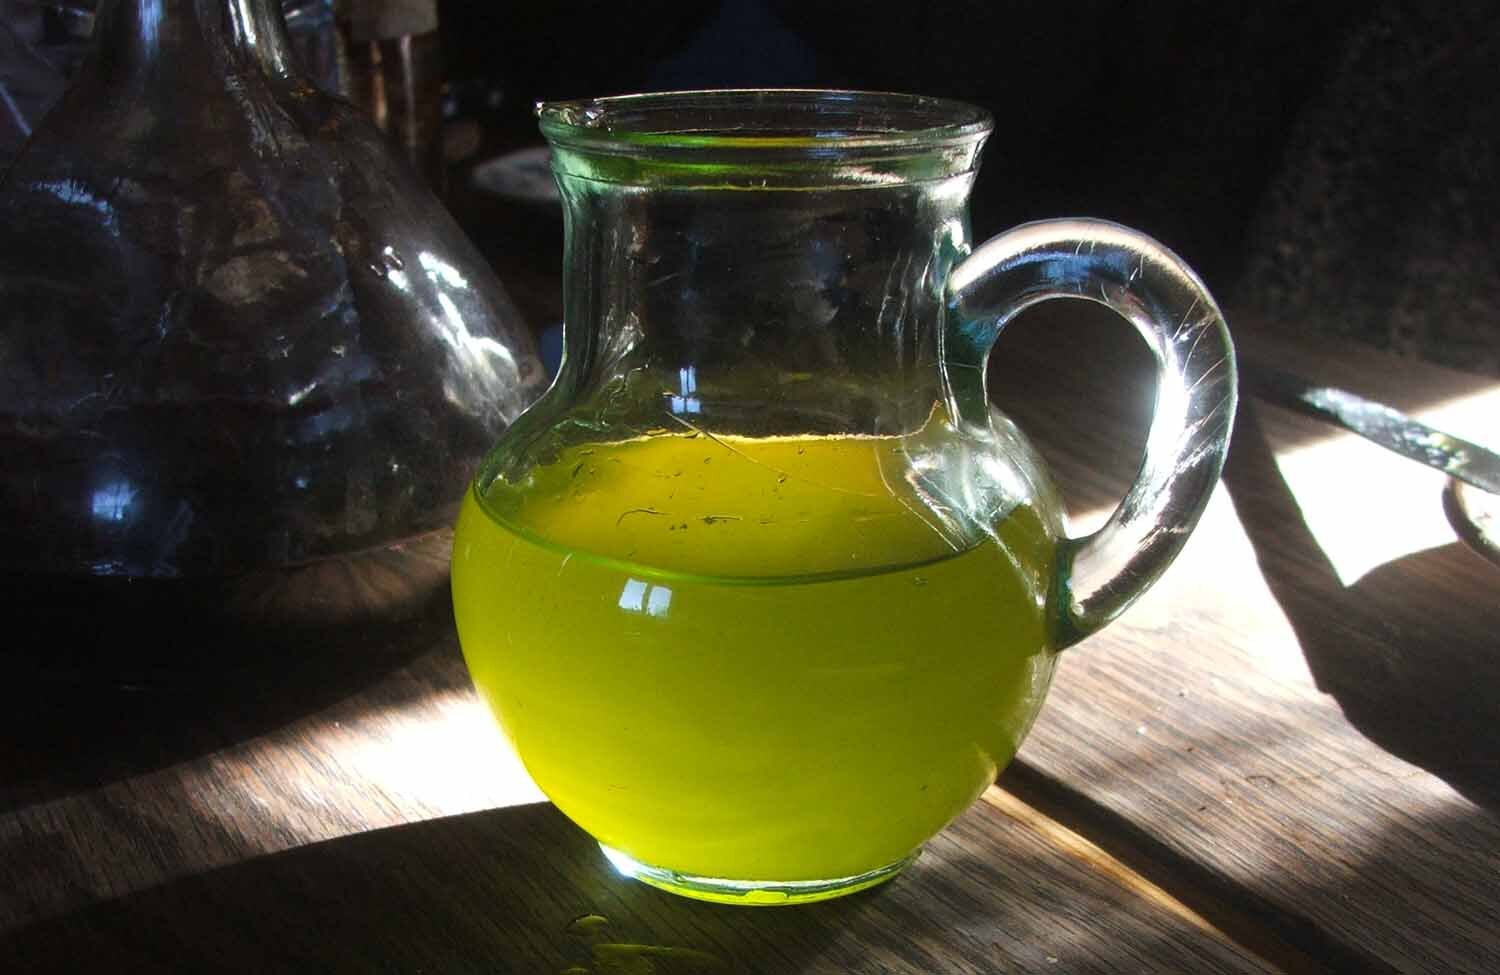
Fill your slow cooker with your choice of carrier oil and add the leaves. I like to chop them up first to allow all the sap to exit easily and leave on the LOW setting for around 12 hours or overnight.
*If you don’t have a slow cooker you can easily make a double boiler, by placing your oil and leaves into a heatproof bowl and sitting it over a pot of boiling water. The only problem with this is that you will need to stay present throughout the day, topping up the water and making sure the oil doesn’t reach boiling point!
The following morning, strain the oil into a jug or jar. It should be a rich green colour, not unlike Oilve Oil. If you used Olive Oil it will be almost bottle green.
It is important that you filter it properly.
I use a colander lined with sheets of bounty kitchen towel. It takes ages but a few sheets of Bounty collect every piece of leaf, errant bug or water droplet. This is important as any bits left in the oil, especialy water droplets can cause your balm to go bad and you don’t want that!
While its straining, get your beeswax and pop it into an old container. In its pure state, Beeswax just wont come off anything, so use something you are happy to lose! An cereal bowl, measuring jug, even an empty tin can work!
If it’s a microwave-safe container then blitz it in there, 90 seconds at a time, stirring regularly until its completely melted. If its a tin can, place it in a saucepan of boiling water until its melted completely. Just be careful not to burn yourself!
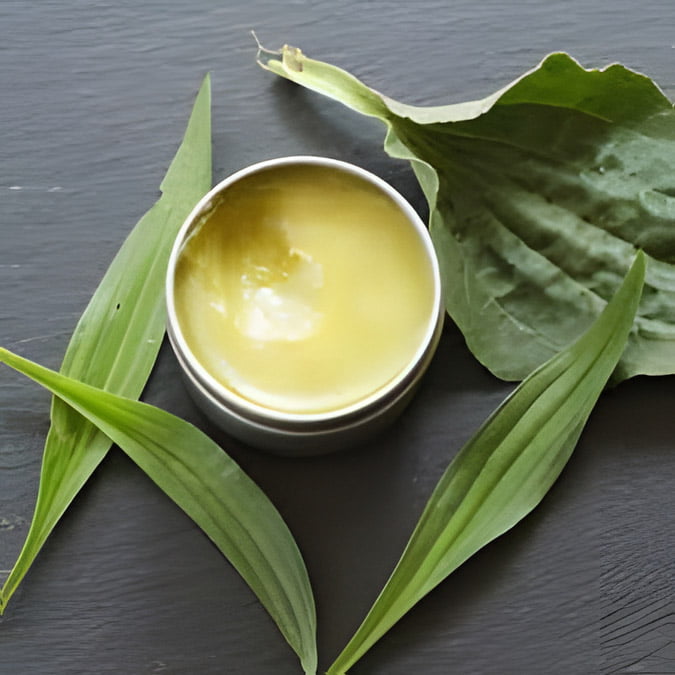
Finally, mix your luscious green oil and the beeswax together and pour into little jars, cupcake papers, yogurt pots, old mint/cigar tins, lip balm tins…. be creative, look for whatever you can upcycle or repurpose. I once used a Barbie suitcase for a beeswax lip balm!
Then leave aside to cool. Once it’s cool, it’s ready to use, so keep a tin in the car or your bag/hiking gear or medicine pack and say goodbye to Sudacrem for now!